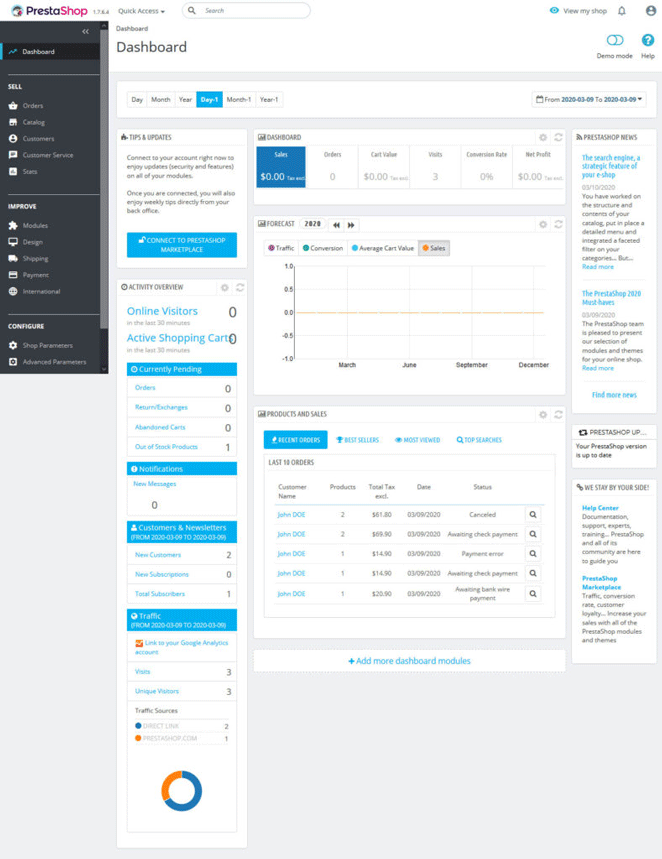
After you login, the first thing you will see is the main dashboard.
The top bar will look familiar to WordPress users. Here’s what it contains:
- A configurable quick access drop-down menu that lets you access important actions and parts of your shop
- A search field to search your entire shop
- The button that says View my shop takes you directly to the front end of your web store
- A notification button that, when clicked, shows you the latest orders, new customers, and messages
- The little trophy icon shows your achievements in setting up your online shop
- Finally, the last icon gives you access to editing your profile and helpful resources
On the left side, you have access to other parts of your shop. We will talk about these in detail further below.
The main part of the screen contains a lot of information about the state of your shop and how to improve it. You can adjust all the statistics you see by changing the time frame at the top to the current or last day, month, or year. You are also able to set a custom time frame and compare it to another like in Google Analytics. If you enable the demo mode in the top right corner, it will populate all the statistics with dummy numbers so you can better understand what they are for.

Most of the elements are pretty self-explanatory. They tell you whether your site is up to date, the number of visitors, shopping carts, orders, sales, top products, and other important shop information. Under Forecast, you can set goals for yourself and PrestaShop will tell you how close you are to reaching them.
The little gear symbol in the upper right corner allows making adjustments to how they display content. Once you know about modules, you can also add more elements like this to your dashboard.
If any of this is unclear, the big help button in the top right corner describes everything on screen in detail. You find that on pretty much every screen in PrestaShop, so if you get stuck, this is where you can turn to.
Of course, when running an online shop, creating and managing products is one of the most central issues. In PrestaShop, you find the functionality for that under Catalog > Products. When you click it, you get to the screen below.
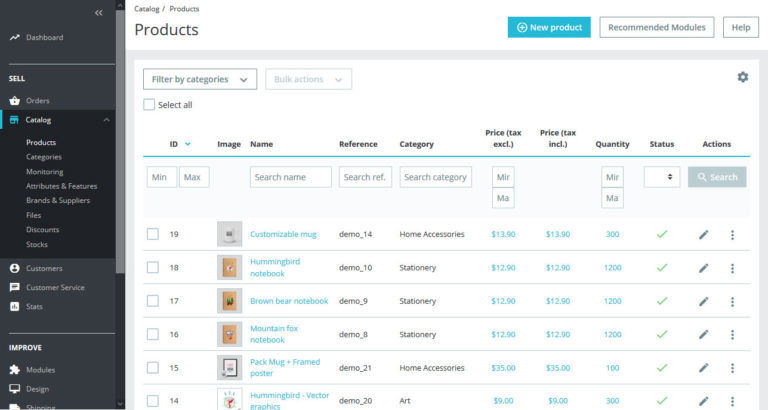
Here, you find a list of all the products on your site. You can also filter, activate/deactivate, duplicate, and delete them from here.
To create a new product, click the button of the same name in the upper right or hit Ctrl+P. That gets you to the following screen.
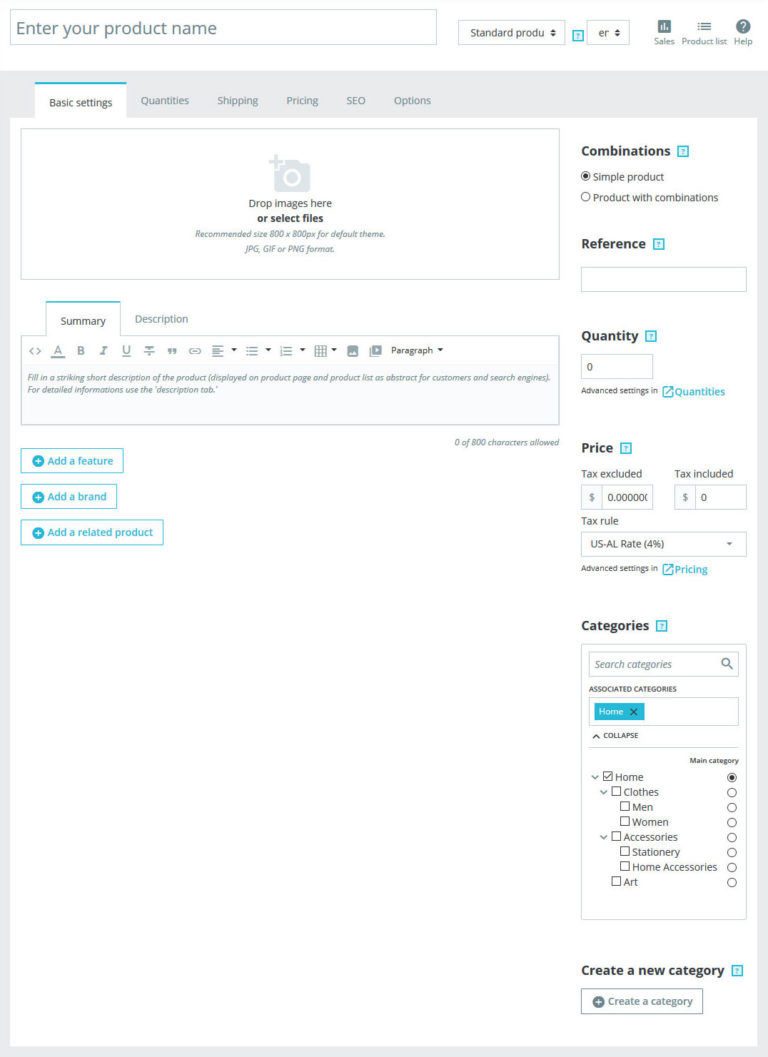
1. Basic Settings
The first thing you need to do here is to include a name for your product at the top. Right next to that, you have a drop-down menu that allows you to determine whether this is a physical product, a product pack (a combination of at least two products already existing), or a virtual product.
Below that, you find your basic settings. Click in the field on top where it says Drop images here to upload product images. When you have several, you can also choose which one will be the cover. Click on them to add a caption.
Next, you find a text editor in which you can add a product summary (which will appear on the shop page) and a longer description that will be visible for those looking at the product itself.
Finally, you able to add features, brands, and related products. Be aware, that you need to have created those in some of the other menus already in order to be able to choose them here.
On the right side there are several options for important data:
- Combinations — Here, you determine whether this is a simple product or one where you can choose things like size, weight, color, etc. If the latter, you can configure this under the Combinations tab that will appear when you enable this option.
- Reference — This is the reference code for this product, which is important for stock management.
- Price — Determine the price with and without taxes as well as the tax rate. More on how to set these up later.
- Categories — Just like blog posts, assigning categories to products makes them easier to filter and find. Choose from the ones you already have on your site or create new ones.
2. Quantities
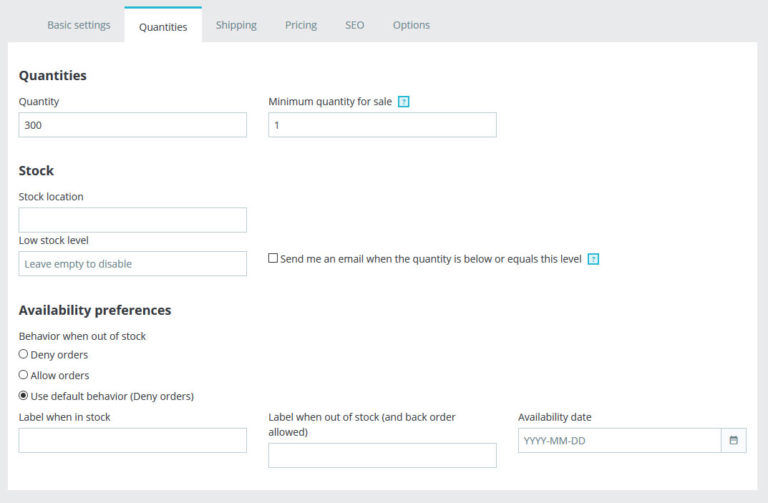
In this tab, you control the stock of this product and backorders:
- Quantity available and minimum quantity per purchase
- Stock location, at which point stock level is considered low and whether to inform you when it gets there
- Allow/disallow backorders, configure what buyers see when the product is in and out of stock, and when it will be available again
3. Shipping
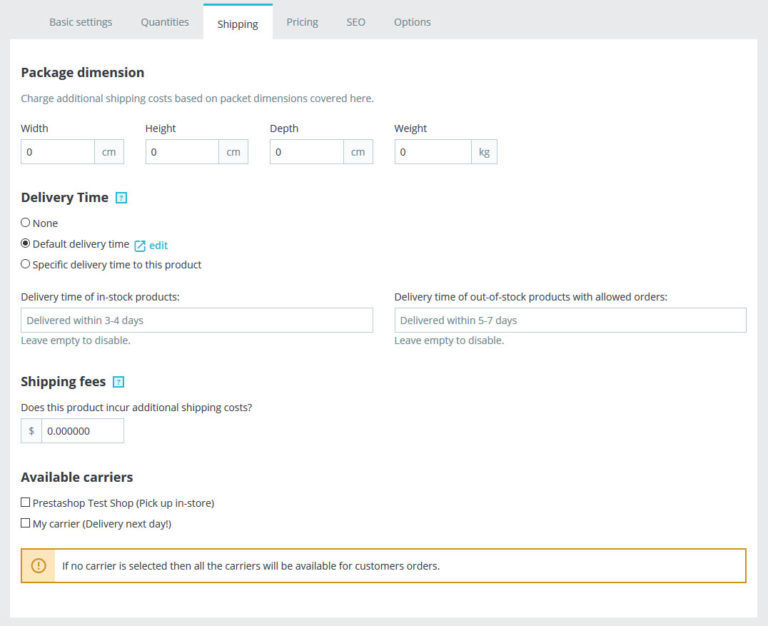
Unsurprisingly, here’s where you deal with everything related to shipping the product:
- Product dimensions and weight to calculate shipping costs
- Delivery time (for both in and out-of-stock product)
- Additional shipping fees if applicable
- Available carriers for this product as configured in your settings
4. Pricing

In this screen, you make adjustments to things that have to do with the pricing of the product:
- Price with or without tax, applicable tax rule, and whether the product is on sale
- Unit price if mandated by your location’s laws
- Cost price, meaning what you paid for it, to... LEARN MORE
Of course, one of the most important aspects of creating your own shop is its design. Therefore, we’re going to cover it in detail.
1. Check Theme & Logo
Our first stop is Design > Theme & Logo.

Here, you will notice the options at the top to set a logo for the homepage, your customer emails, and invoices. You are also able to set a favicon (the little icon that will appear in browser tabs). It’s as easy as clicking Browse or Choose files, uploading, and then saving afterward. Note the size recommendation in the upper left corner.
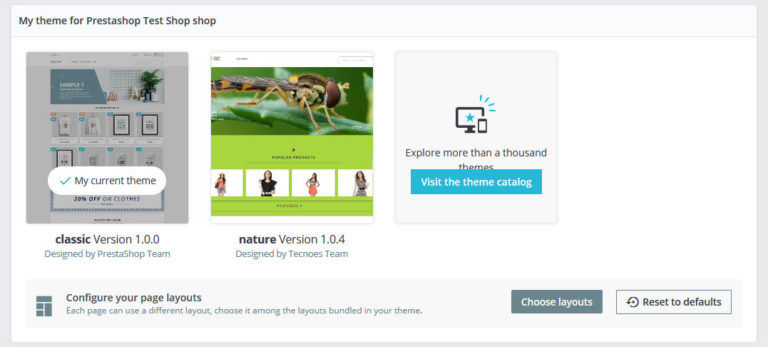
Below that, you see your current theme and find buttons to visit the theme catalog and modify page layouts. We will get to that shortly.
Finally, at the bottom, you see themes available in the PrestaShop marketplace that you can access from here.
2. Install and Change Your Theme
If you want to change the theme of your PrestaShop store, you can find a few themes under Design > Theme Catalog. However, in order to get them, you need to go to the theme marketplace, so you might as well do that directly.

Here, you can filter themes according to your PrestaShop version, shop category, language, and much more. Unfortunately, the official marketplace does not contain any free themes, and prices are between $60 and $300.
Once you have settled on a theme (and/or purchased it), back in your shop, click on +Add new theme at the top.
You then have three ways of getting your theme on your site:
- Upload it as a zip file
- Import it directly from its URL
- FTP it into the themes folder in your PrestaShop installation and pick it from the drop-down menu

Once uploaded, it appears in your theme list under Theme & Logo.
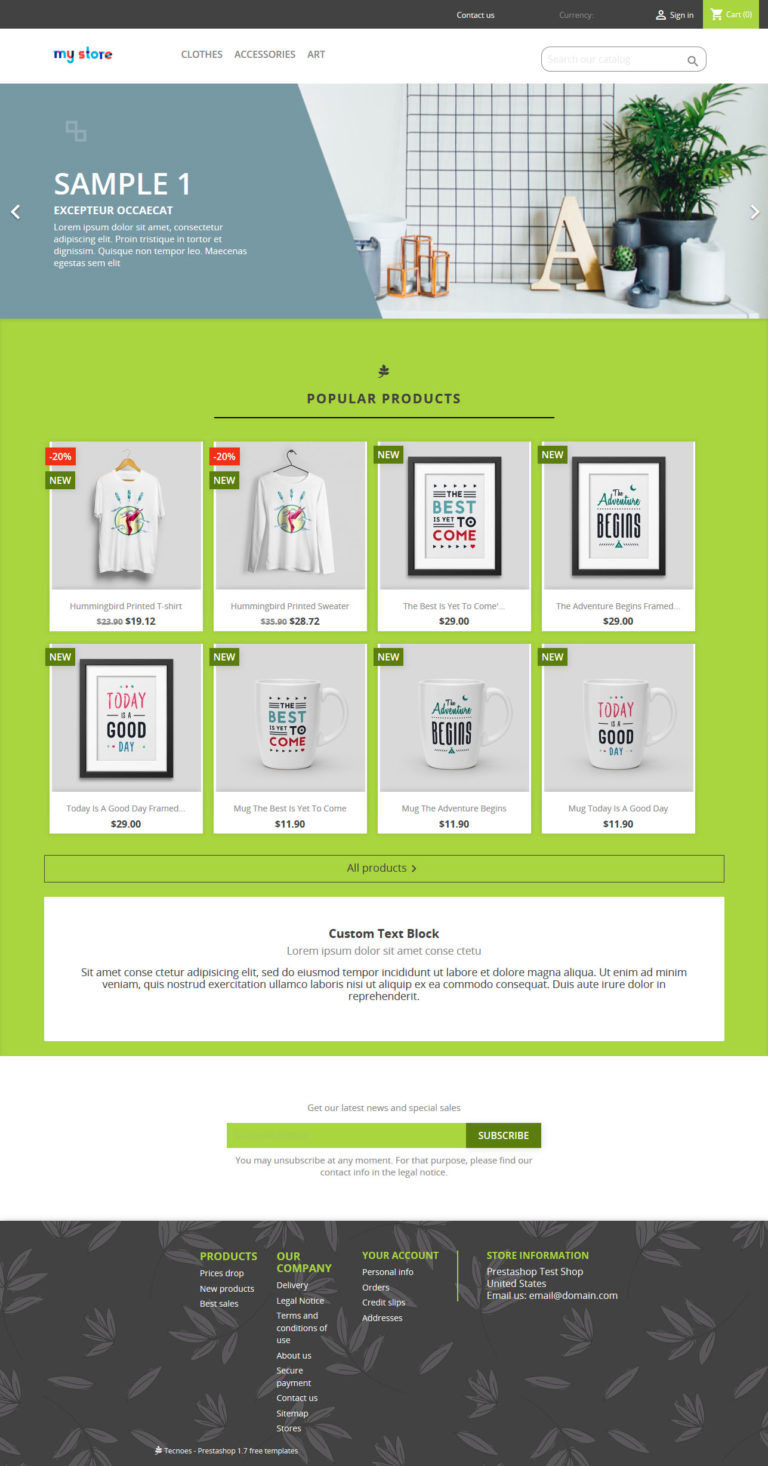
A click on Use this theme (hover over the new theme and confirm) activates it. After that, when you view your shop, you can see that the content is the same, however, the design has changed.
3. Choose Page Layouts
A rather unassuming button with an important function is the Choose layouts button below your theme list. When you click on it, you get to a page where you can pick the layout of each of the pages on your site via the drop-down menu. What is available depends on what your theme has to offer.
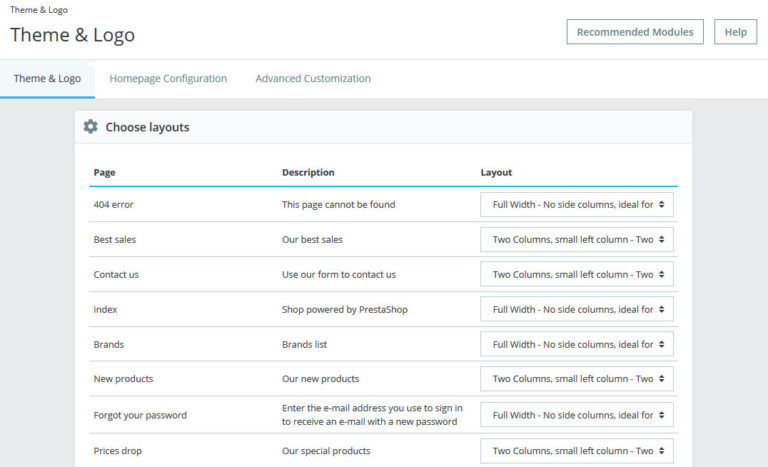
For example, the theme we just installed allows you to choose between a full-width, three-column, or two two-column layouts. Therefore, if you are not satisfied with the layout of one of your pages, this is where you change it.
4. Change the Homepage Configuration
At the top of Theme & Logo, you find a tab called Homepage Configuration. As you can imagine, this is where you make changes to your homepage. The horizontal bars represent the different modules currently active there. When you click one, this also highlights it on the schematic on the left.
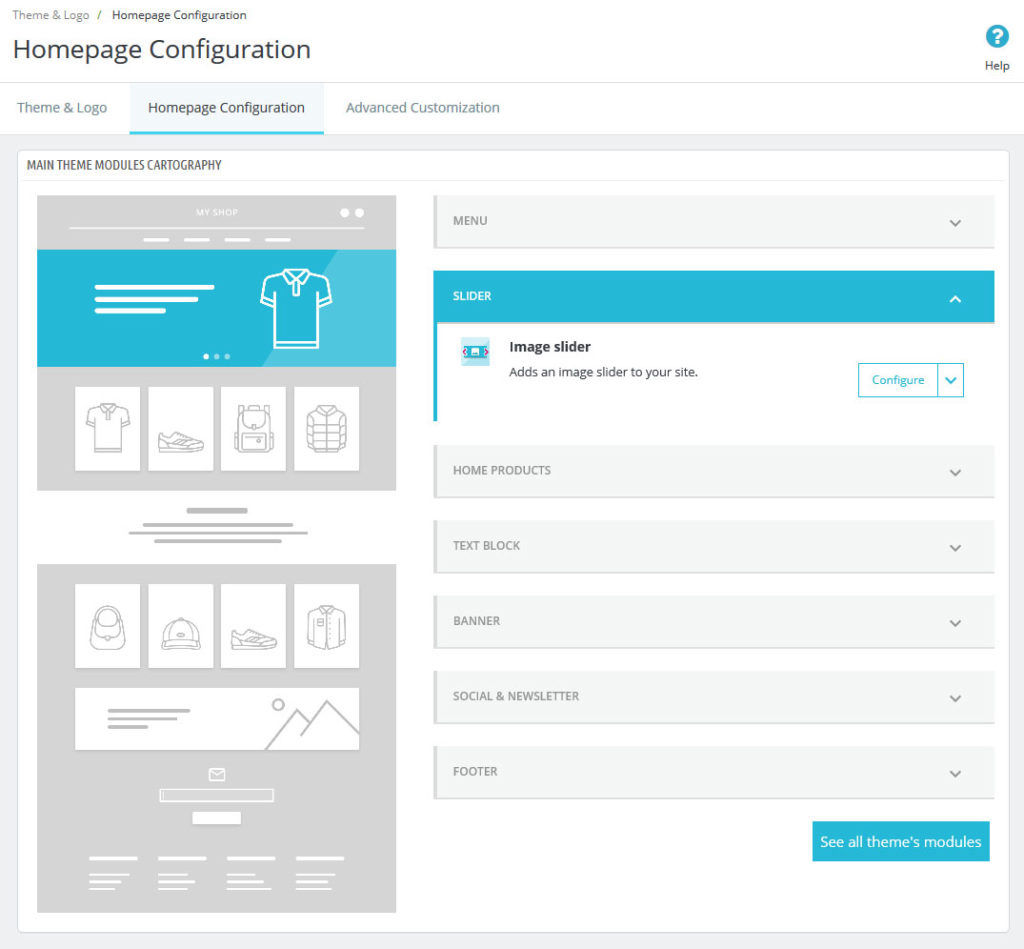
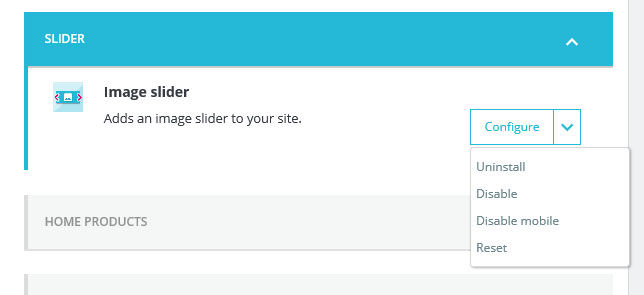
If, for example, you want to disable the slider, simply click it, then the little arrow, and choose Disable. This will also remove it from the front end of your shop.
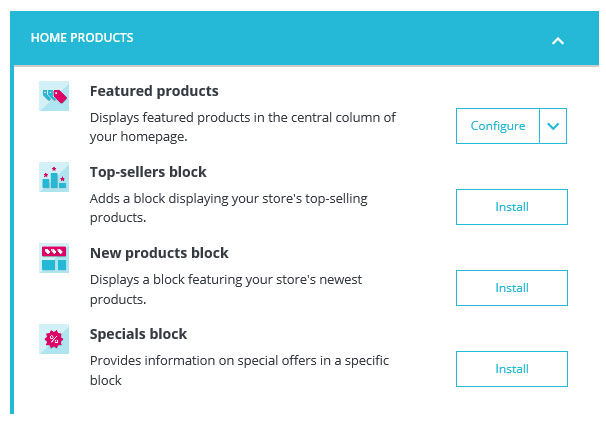
For some positions, such as Home Products, it also proposes certain blocks you can install right from this page.
Furthermore, the menu provides you with links to other parts of the back-end where you can make more changes. For example, if you want to add modules to the homepage or change their order, you need to do it in the Modules section. More on that now.
5. Work With Modules
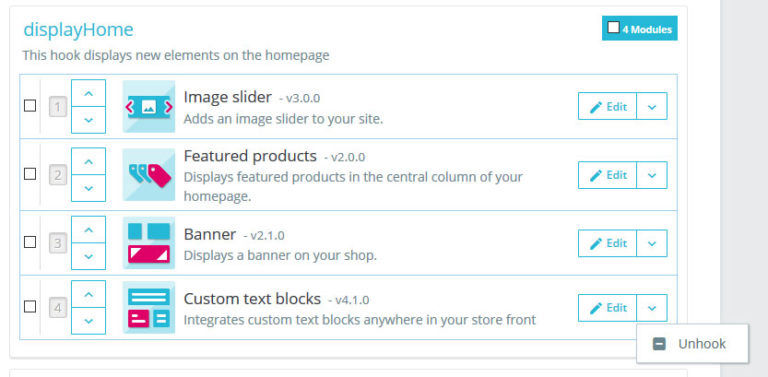
Let’s turn our attention to Design > Positions. Don’t worry if it seems a bit technical at first, you will get the hang of it quickly. What you see here are all the hooks in your theme and the modules attached to them.

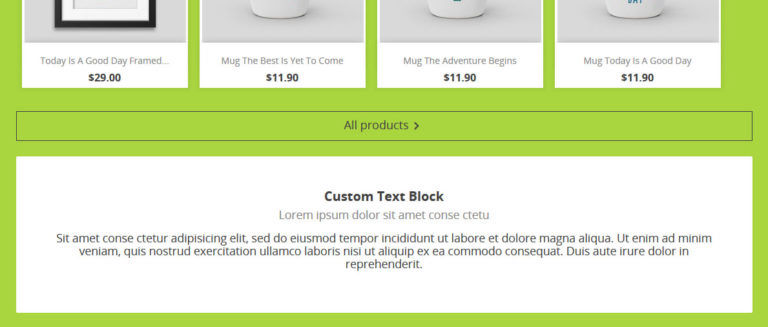
Hooks are set locations in your theme (both in the front-end and back-end) and modules can be things like widgets, statistics, link lists, subscription forms, image sliders, social buttons, and more. For example, at the displayHome hook, you find a module called Custom text blocks.
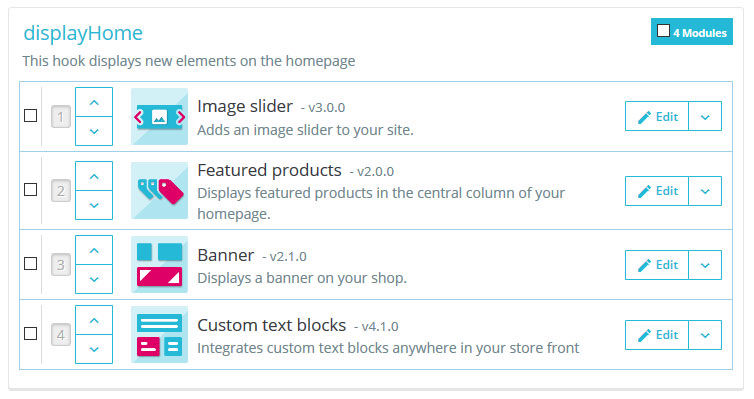
As you can probably guess, this is the Lorem ipsum filled block on the homepage.
The short description of the hook also tells you its position in the theme. Consequently, if you want to make changes to this block, this is where you do it.
One of the first things you can do is use the up and down arrows or click on the position number to drag and drop the module to a different position. This way, you can change where the block appears. Changes are automatically saved, so they are directly visible on the front page as well.
To get rid of modules completely, click the little arrow button, and choose Unhook.
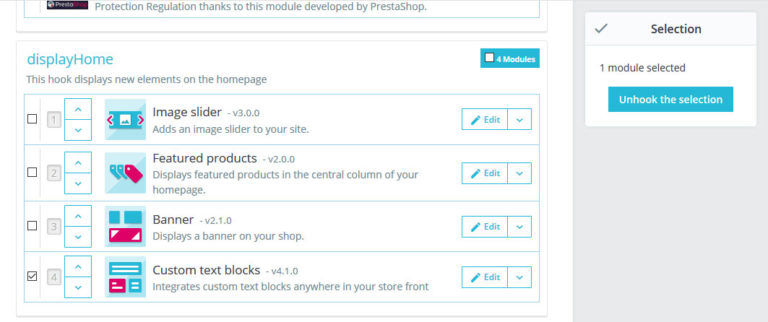
Alternatively, tick the boxes on the left of several modules and click the Unhook the selection button that appears.
6. Transplant Modules
If you want to get it back, you have to re-attach the module to the hook. This is called “transplanting” in PrestaShop and has its own page. You can get there via the Transplant a module button at the top right of the Positions screen.
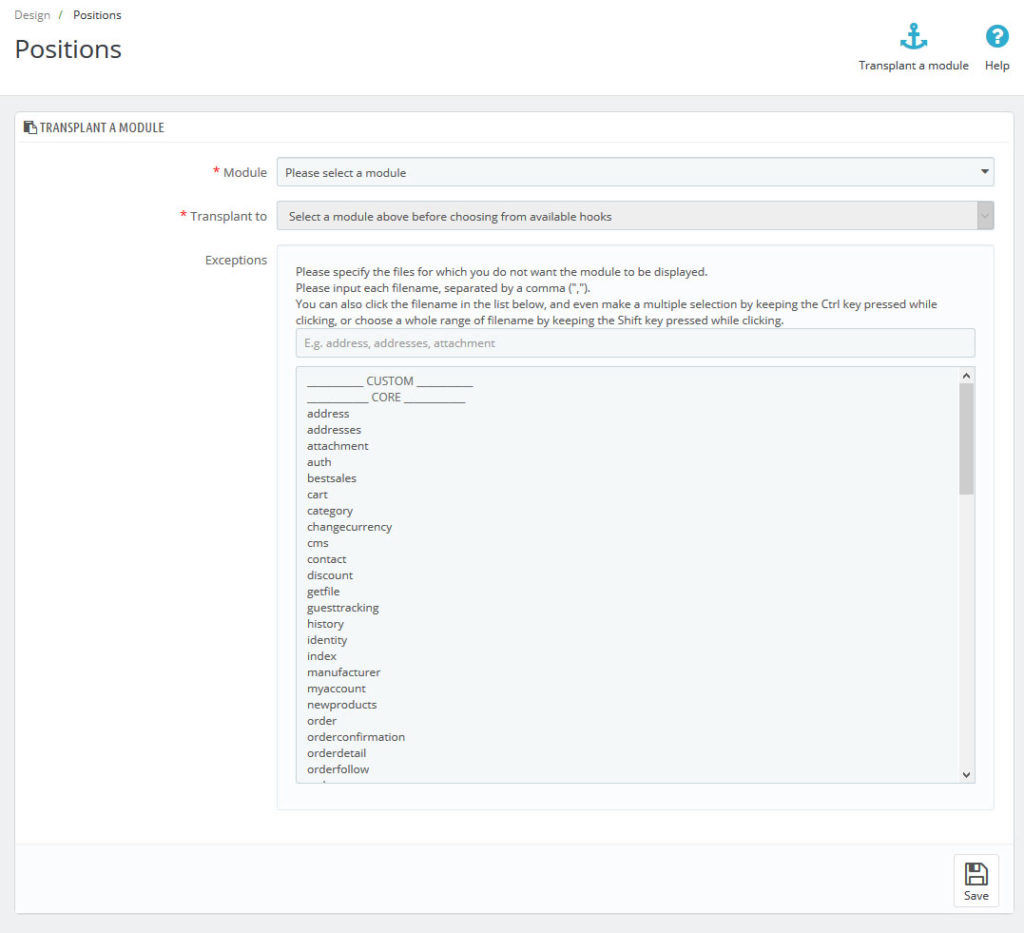
The drop-down list on top shows you the available modules on your site. Once you have picked the one you want, the Transplant to list becomes active and gives you all the places you can attach it to. Under Exceptions, you are able to define where this particular module should not appear. This isn’t really applicable in this case but... LEARN MORE
Once you have created your products and designed your shop, it’s time to setup a payment gateway. You can do that under Payment > Payment Methods.
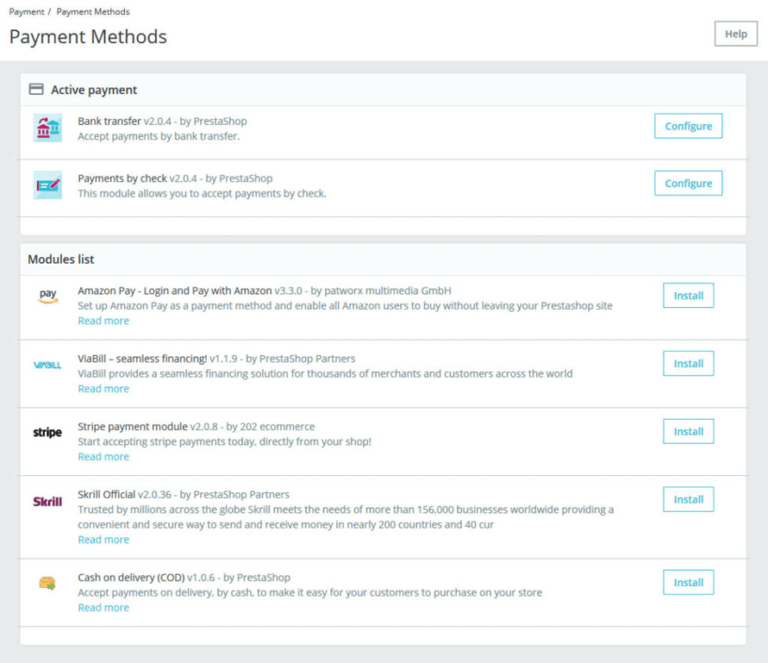
At the top, you find the payment methods already available to your customers. Below... LEARN MORE
One of the final steps might be to localize and translate your shop for international customers. PrestaShop makes that really easy and you can find the options under the International > Localization panel.
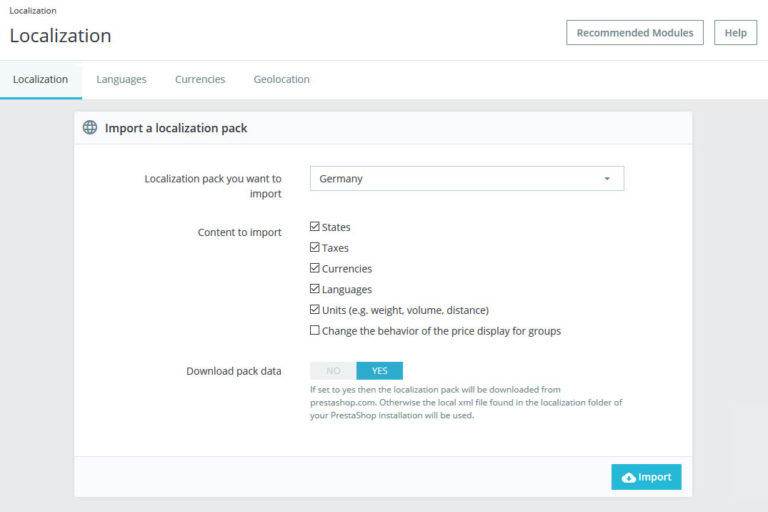
Here, it lets you set up your default language, country, currency, time zone, units, etc. You are also able to set those for different locales you might be catering to.
The cool thing: PrestaShop comes with a lot of it already pre-configured. Instead of inputting everything manually, you can download so-called localization packs. Simply pick which country you want to localize your shop for and which parts you need to adjust (states, taxes, currency, language, units). Then, hit Import.
You will then get all of it on your site so you can offer it to clients. Plus, PrestaShop automatically includes a language and currency switch to your shop if more are available.

In addition, you will find the option to include translations for your pages and products in the back end.
Aside from the above, you find three other tabs in the Localization panel:
- Languages — The languages installed on your site. Delete the ones you don’t need anymore and edit the date format and other language properties.
- Currencies — Same as languages but for currencies. It also includes the possibility to enable live exchange rates.
- Geolocation — This allows you to restrict access to your shop or parts of it depending on the location of the visitor.
Other Localization Menus
Here is what else the International section contains:
Locations — Here, you define geographical locations that you sell and ship to or that customers can choose as their location when they register. This is also where you configure tax settings, currency, and important shipping settings depending on customer location.
Taxes — This menu includes all taxes saved in your shop. You control which tax rate applies to what geographical region, the percentage, and more. PrestaShop automatically imports this from localization packs but you can also make manual changes.
Translations — PrestaShop and its components come in many languages but not all of them are complete. If something is not right, in this menu, you can make changes to pretty much all translations.
PrestaShop offers a multitude of settings that are located in Shop Parameters and Advanced Parameters. There are too many to go over them one by one so here is a short overview.
Shop Parameters
- General — SSL and other security settings, rounding of numbers, display settings, multistore, main shop category, and ways to set your shop to maintenance mode
- Order Settings — What customers see in the checkout and whether guest checkouts are possible, minimum purchase and gift options, order status messages
- Product Settings — Ability to switch off shopping carts, settings for new products and product descriptions, product page display options, stock, and out-of-stock management, pagination
- Customers — What information to ask from and show to customers, customer groups (e.g. for discounts), titles customers can choose for themselves (e.g. Mr./Mrs)
- Contact — Contact information to display on the Contact Us page and shop locations
- Traffic & SEO — Edit the permalink of pages on your site, set up meta descriptions, SEO title, and other meta information, change the URL structure, configure robots.txt, the search engines your PrestaShop installation knows, and view websites that refer visitors to you
- Search — Settings to improve search on your site, for example, aliases of misspelled words and tags used on your site
- Merchant Expertise — Gamification feature that gives you badges and other rewards for completing certain parts of setting up your site
Advanced Parameters
- Information — Collected data about your shop such as server and database information
- Performance — Ways to improve shop performance, clear cache, enable debug mode, compression, caching, and more
- Administration — Module update and cookie settings, upload quota and notifications
- E-mail — List of emails sent from your installation of PrestaShop, settings for sending emails and testing them
- Import — Import data in CSV form
- Team — Configure who has access to your shop, what role they have, and what permissions that entails
- Database — Deals with the underlying database and lets you run SQL queries, back up and restore the database from inside PrestaShop
- Logs — Everything that has been going on in your shop (such as user actions) is logged here
- Webservice — Create API keys to connect PrestaShop with third-party software
PrestaShop is a powerful eCommerce suite. It allows you to build a full-fledged online shop with advanced features. You can customize it to your needs, and start selling in no time.
While the settings are very complex, it has a beginner-friendly interface and is suitable for non-technical users. It just takes a while to understand what part of the admin interface does what.
The amount of features the free version offers is a positive surprise. Other solutions charge money for much of what, with PrestaShop, you get right out of the box.